Deploy your own Fediverse instance with Snac
Mar 9, 2026 - ⧖ 10.0 min🗒️
- What you will need
- Why Snac?
- A note about domain choice
- Step 1: Install build dependencies
- Step 2: Build and install snac
- Step 3: Create a system user
- Step 4: Initialize the data directory
- Step 5: Create your first user
- Step 6: Set up systemd
- Step 7: Configure nginx as reverse proxy
- Step 8: Verify federation
- Administration tips
- Upgrading snac
- The easy way: YunoHost
- Conclusion
If you want to be in the Fediverse without relying on big intances, or if you just want to own your data and your identity on the network, running your own instance is the way to go.
The problem is that most Fediverse software like Mastodon requires a lot of resources, complex setups, and ongoing maintenance. That is where Mastodon alternatives such as GoToSocial and snac comes in.
GoToSocial is amazing and powerful, this is the one I have been using for a long time, it is written in Go and used PostgreSQL for database, can really handle mid/large instances.
However, deploying GoToSocial still requires some skills and the maintanance of a GTS instance requires knowing how to manage a database because the DB migrations are the main point of issues if something goes wrong (but it rarely goes wrong, GTS is preety stable)
I personally find Snac more appealing for single user or small instances, because it is really simple and can even be deployed along side on your existing VPS or Home Server.
snac (Social Networks Are Crap) is a minimalistic, lightweight ActivityPub instance written in C. It is perfect for single user instances or small communities, and it runs so light that even a Raspberry Pi can handle it without breaking a sweat.
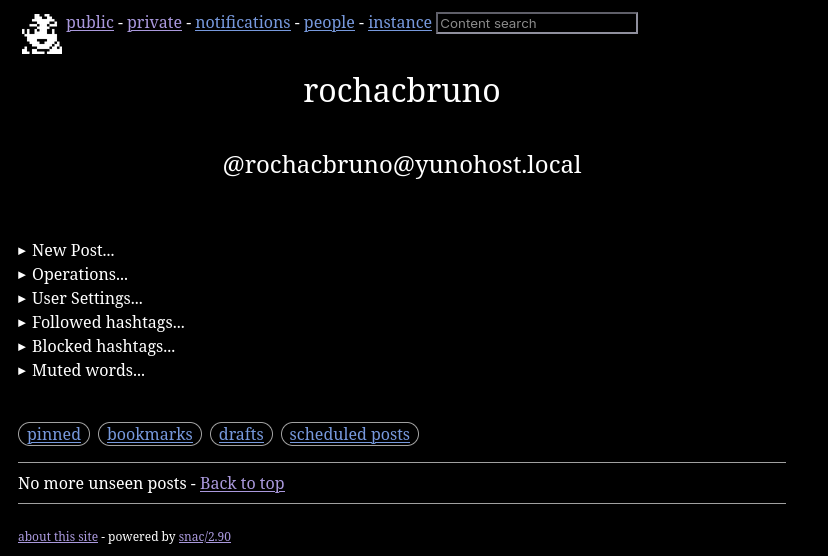
You can get an idea of how it looks like by acessing my own instance on https://cesar.rocha.social/bruno
One of the things I find genius about snac is the decision to use the filesystem as
its database. No PostgreSQL, no Redis, no migrations. Just files and hard links on
disk. This makes everything simpler: backups are just a tar or rsync, there is
nothing to tune or vacuum, and you can inspect your data with plain old ls and cat.
The web interface has zero JavaScript, no cookies, and no tracking. It looks simple but it is surprisingly powerful. You can do everything from the browser without needing any external client. That said, snac fully implements the Mastodon API, so all the popular Mastodon clients like Tusky, Phanpy, Ice Cubes, and Elk work perfectly with it.
And it is not just a barebones server either. Snac supports modern Fediverse features like account migration (Move), scheduled posts, polls, emoji reactions, custom emojis, media proxying for privacy, and even Webmention support.
In this guide I will walk you through the complete process of deploying snac on a fresh Debian system, from compilation to a fully federating instance with systemd and nginx.
What you will need
- A VPS or home server running Debian 11+ (or Ubuntu 20.04+)
- A domain name pointing to your server (e.g.
snac.yourdomain.com) - Root or sudo access
- About 10 minutes of your time
Note
Snac can also be deployed to a Container the official repo includes an example https://codeberg.org/grunfink/snac2/src/branch/master/docker-compose.yaml
Why Snac?
Before jumping into the setup, here is why snac is a great choice:
- Minimal dependencies: only needs OpenSSL and curl
- No database: everything is stored as files on the filesystem using hard links
- Multiuser: you can host multiple accounts on a single instance
- Mastodon API compatible: works with apps like Tusky, Ice Cubes, Megalodon, Phanpy, Elk, etc.
- Tiny footprint: runs happily on a $5/month VPS or even a Raspberry Pi
- Federation works out of the box: tested with Mastodon, Pleroma, Friendica, Misskey, and others
A note about domain choice
Before you start, you need to decide how your instance will be accessible. Snac supports two options:
- Subdomain:
snac.yourdomain.com(recommended) - Subpath:
yourdomain.com/snac
Important
This choice is permanent. Once you initialize snac with a host name and path
prefix, it cannot be changed later. Your identity on the Fediverse is tied to this
URL, and all federation, followers, and interactions depend on it. Choose wisely
before running snac init.
For this guide I will use snac.yourdomain.com as the example domain.
Step 1: Install build dependencies
First, update your system and install the required packages:
sudo apt update && sudo apt upgrade -y
sudo apt install -y build-essential libcurl4-openssl-dev libssl-dev git
That is it. No Ruby, no Node.js, no Redis, no PostgreSQL.
Step 2: Build and install snac
Clone the repository and compile:
git clone https://codeberg.org/grunfink/snac2.git
cd snac2
make
sudo make install
Note
On Ubuntu 20.04 or some older Debian versions, you may need to add LDFLAGS=-lrt
to the make command: make LDFLAGS=-lrt
This installs the snac binary to /usr/local/bin/ and the man pages to
/usr/local/man/.
You can verify the installation:
snac It should print the usage information and available commands.
Step 3: Create a system user
Create a dedicated user for running snac:
sudo useradd -r -s /usr/sbin/nologin -m -d /home/snac snacNote
Make sure the filesystem where /home/snac lives supports hard links (ext4, xfs,
btrfs all work fine). snac makes heavy use of hard links for storage, so do not
place the data directory on a filesystem that does not support them.
Step 4: Initialize the data directory
Run the init command as the snac user:
sudo -u snac snac init /home/snac/dataThis will ask you a few questions interactively:
- Host name: your public domain (e.g.
snac.yourdomain.com) - Path prefix: leave empty unless you want snac under a subpath like
/snac - Network address: use
127.0.0.1(nginx will handle public traffic) - Port: use
8001(or any available port)
The configuration is saved to /home/snac/data/server.json. You can edit it
later to tune things like timeline purge days, queue settings, and more.
Here are some useful settings you might want to adjust in server.json:
{
"title" : "My Fediverse Instance" ,
"short_description" : "A personal snac instance" ,
"admin_email" : "admin@yourdomain.com" ,
"proxy_media" : true ,
"strip_exif" : false ,
"timeline_purge_days" : 120 ,
"dbglevel" : 0
}Setting proxy_media to true is recommended for privacy, as it proxies remote
media through your instance instead of having your visitors fetch images directly
from external servers. And strip_exif removes metadata from uploaded images, flip to true if you want it.
Important
strip_exif requires imagemagick and ffmpeg to be installed and the process can increase the size of images significantly
Step 5: Create your first user
sudo -u snac snac adduser /home/snac/data yourusernameIt will ask for a display name, and then it will generate a random password
and print it to the terminal. Copy it and save it somewhere safe. You can
change it later from the web interface or reset it with snac resetpwd.
Step 6: Set up systemd
Create the service file at /etc/systemd/system/snac.service:
[ Unit ]
Description = snac2 ActivityPub instance
Documentation = https://codeberg.org/grunfink/snac2
After = network.target
Wants = network-online.target
[ Service ]
User = snac
Group = snac
ExecStart = /usr/local/bin/snac httpd /home/snac/data
Restart = on-failure
RestartSec = 5
NoNewPrivileges = yes
PrivateTmp = yes
PrivateDevices = yes
ProtectSystem = full
[ Install ]
WantedBy = multi-user.targetEnable and start the service:
sudo systemctl daemon-reload
sudo systemctl enable snac
sudo systemctl start snac
Check that it is running:
sudo systemctl status snacYou can also follow the logs in real time:
sudo journalctl -u snac -f Step 7: Configure nginx as reverse proxy
Install nginx and certbot if you have not already:
sudo apt install -y nginx certbot python3-certbot-nginxCreate a new site configuration at /etc/nginx/sites-available/snac:
server {
listen 80 ;
server_name snac.yourdomain.com ;
client_max_body_size 100M ;
location / {
proxy_pass http:// 127.0.0.1 :8001 ;
proxy_set_header Host $http_host ;
proxy_set_header X-Forwarded-For $remote_addr ;
}
} Enable the site and get a TLS certificate:
sudo ln -s /etc/nginx/sites-available/snac /etc/nginx/sites-enabled/
sudo nginx -t
sudo systemctl reload nginx
sudo certbot --nginx -d snac.yourdomain.com
Certbot will automatically modify your nginx config to add HTTPS and redirect HTTP traffic.
Important
The Host and X-Forwarded-For headers are essential. Without Host,
snac will generate wrong URLs. Without X-Forwarded-For, the login
rate limiting will not work properly.
Optional: Media caching with nginx
If you enabled "proxy_media": true in your server.json, snac will proxy remote
media through your instance for privacy. You can add nginx caching to reduce
load on your server.
Add to your /etc/nginx/nginx.conf inside the http block:
proxy_cache_path /var/cache/nginx/snac_media levels=1 :2 keys_zone=snac_media :10m
max_size=1g inactive=1d use_temp_path=off ;Then add this location block before the catch all location / in your site config:
location ~ ^/.+/( x|y) / {
proxy_cache snac_media ;
proxy_pass http:// 127.0.0.1 :8001 ;
proxy_set_header Host $http_host ;
proxy_set_header X-Forwarded-For $remote_addr ;
proxy_cache_valid 200 1d ;
proxy_cache_valid 404 1h ;
proxy_ignore_headers "Cache-Control" "Expires" ;
proxy_cache_use_stale error timeout updating http_500 http_502 http_503 http_504 ;
proxy_cache_lock on ;
add_header X-Proxy-Cache $upstream_cache_status ;
} Create the cache directory and reload:
sudo mkdir -p /var/cache/nginx/snac_media
sudo chown www-data:www-data /var/cache/nginx/snac_media
sudo nginx -t && sudo systemctl reload nginx
Step 8: Verify federation
At this point, your instance should be live and federating. Let us verify:
curl -s "https://snac.yourdomain.com/.well-known/webfinger?resource=acct:yourusername@snac.yourdomain.com" You should get a JSON response with your account information. If that works, your instance is discoverable by the rest of the Fediverse.
Now open your browser and go to https://snac.yourdomain.com/yourusername
to see your profile. Log in through the web interface, write your first post,
and try following someone from another instance.
You can also use any Mastodon compatible app (Tusky, Ice Cubes, Phanpy, Elk, Megalodon, etc.) by pointing it to your instance URL and logging in with your credentials.
Administration tips
Here are some useful commands for day to day management:
| Task | Command |
|---|---|
| Add a new user | sudo -u snac snac adduser /home/snac/data username |
| List all users | sudo -u snac snac userlist /home/snac/data |
| Reset a password | sudo -u snac snac resetpwd /home/snac/data username |
| Check server state | sudo -u snac snac state /home/snac/data |
| Block an instance | sudo -u snac snac block /home/snac/data instance.com |
| Unblock an instance | sudo -u snac snac unblock /home/snac/data instance.com |
| Purge old data | sudo -u snac snac purge /home/snac/data |
| Export user data | sudo -u snac snac export_csv /home/snac/data username |
Creating a snac-admin wrapper
Typing sudo -u snac snac ... /home/snac/data every time gets old fast.
You can create a simple wrapper script to make administration easier.
Create /usr/local/bin/snac-admin:
#!/bin/bash
# Wrapper script for snac2 CLI commands
# Usage: snac-admin <command> [options...]
# Example: snac-admin adduser myuser
# snac-admin resetpwd myuser
# snac-admin userlist
# Re-exec as the snac user if running as root
if [ " $( id -u ) " -eq 0 ]; then
exec sudo -u snac " $ 0" " $ @"
fi
export SNAC_BASEDIR ="/home/snac/data"
exec /usr/local/bin/snac " $ @" Make it executable:
sudo chmod +x /usr/local/bin/snac-adminNow you can simply run:
sudo snac-admin adduser newuser
sudo snac-admin userlist
sudo snac-admin resetpwd someuser
Upgrading snac
When a new version is released, updating is straightforward:
cd snac2
git pull
make
sudo make install
If the release notes mention a data format change, stop the service first and run the upgrade command:
sudo systemctl stop snac
sudo -u snac snac upgrade /home/snac/data
sudo systemctl start snac
Important
Never run the upgrade command while the service is active.
Always backup your data directory before updating, remember, the database are the files under /home/snac/data simply cp -R /home/snac/data /backup/location or use your preferred compression and syncing tool.
The easy way: YunoHost
If you do not want to deal with manual configuration, nginx, systemd, and TLS certificates, there is an even simpler option.
YunoHost is a server operating system that makes self hosting accessible to everyone. It handles domain management, TLS, backups, user management, and application installation through a web interface.
Snac is available as an official YunoHost application. You can install it with a few clicks from the YunoHost admin panel or via the command line:
yunohost app install snacThe YunoHost package takes care of everything: compiling from source, configuring nginx with proper headers, setting up systemd with security hardening, creating the admin user, and even providing a configuration panel where you can tweak over 50 settings without touching any JSON files. It also handles backups and restores automatically, so you can migrate between servers without losing data.
Check the official package page for more details: https://apps.yunohost.org/app/snac
Conclusion
Running your own Fediverse instance does not have to be complicated or expensive. With snac, you get a fully functional ActivityPub server that compiles in seconds, uses almost no resources, and federates perfectly with the rest of the network.
Whether you set it up manually on a Debian VPS, run it on a Raspberry Pi at home, or use YunoHost for a managed experience, you will have full control over your social presence on the Fediverse.
The source code is available at codeberg.org/grunfink/snac2.
Now go follow me at my GtS @bruno@rocha.social AND/OR my Snac @bruno@cesar.rocha.social
